
Close


STELLAR Clay Collages
Lesson Plan, Grades 6-12, Sax Lesson Plans, Art, Social Studies, Mayco
Description
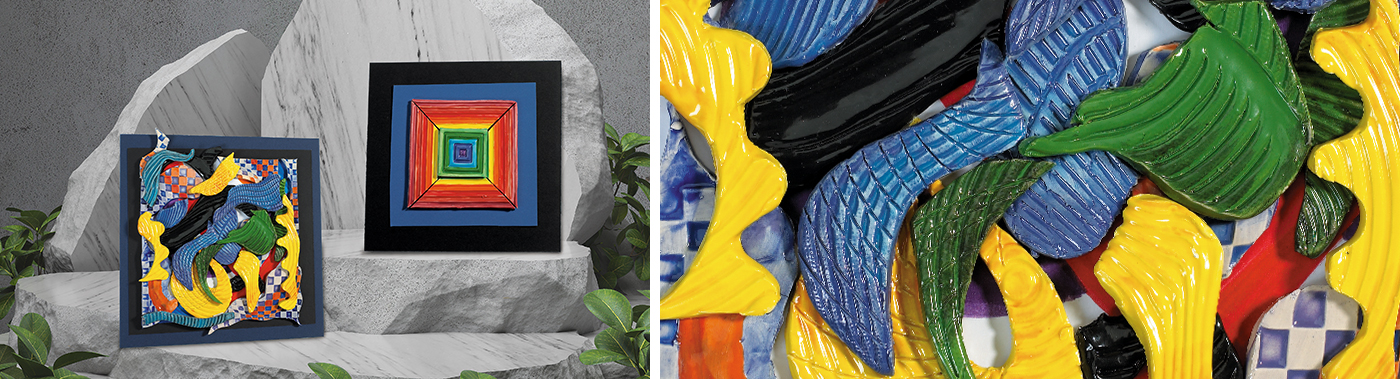
Frank Stella is an American painter, sculptor and printmaker. He is well known for his minimalist approach to painting. He used simple lines, shapes, colors and textures, skillfully combining them into masterpieces of design and form. Specifically this lesson looks at his metal work, which joined brightly painted or enameled strips into large dimensional wall collages.
Objectives
- Students will explore line, color, shape and texture to create a dimensional ceramic art piece.
- Students will explore the properties of glazes to create a balanced collage piece.
Supplies Needed
Sax® Cream White Clay, 50 lbs. mois 200366
Mayco® Stroke n Coat Wonderglaze for Bisque, 12-pint Color Set A 4 406464
Sax® True Flow® Gloss Glazes,12-pint Set 40646705
North Star Porta Roller 410646
Sax® 20 Piece Potters Tool Kit 1429166
Roylco® Optical Illusion Rubbing Plates 217608
Roylco® Texture Rubbing Plates 4 587944
E6000 Multi-Purpose 443195
Multi-Purpose Adhesive 6000
Standards
CONTENT Standard #1: Understanding and applying media, techniques and processes.
CONTENT Standard #4: Understanding the visual arts in relation to history and cultures.
Instructions
1
Discuss the meaning of minimalist painting, abstract painting and expressionist painting. Compare and contrast the types of work and their place in art history and culture.
2
Discuss the elements of art and the principles of design that are shown in Frank Stellas work.
3
Demonstrate the process of rolling out a clay slab with a texture sheet in the slab roller. Slabs should be at least ¼" thick, and a bit drier than fresh clay to prevent them from sticking to the texture sheet. You could make these slabs ahead of class to save time, giving each student a 6"x 6" piece.
4
After rolling a ¼" thick clay slab, students should smooth the 6"x 6" clay slab with a throwing rib to remove the canvas texture and lay the texture sheet on top. Cover with canvas and roll through the machine at ¼" again.
5
Carefully remove the texture sheet and cut shapes from the textured clay with potters tools. Be sure to reference Stellas shapes and movement. Use your fingers to smooth the edges of the pieces.
6
Bisque fire the clay to the recommended temperature, following the manufacturers advice.
7
After bisque firing, dark colored glazes are used all over the pieces. Be sure to push the glaze into the texture. Wipe off the surface of the piece with a clean, damp sponge several times so that only the deep parts retain color.
8
Brush glazes onto the high relief areas with a medium or light color. If any bare bisque remains, brush on a clear gloss glaze.
9
Glaze fire to the manufacturers recommendations.
10
Lay out the pieces in several ways. It sometimes helps to take digital pictures of the pieces in several different positions. Once you have the configuration you like, glue down the pieces using E6000 Multi-Purpose Adhesive. Continue adhering pieces until your collage is finished.
11
Perform a critique of the student artwork, being sure to touch on the elements and principles of design present in each work.


