
Close


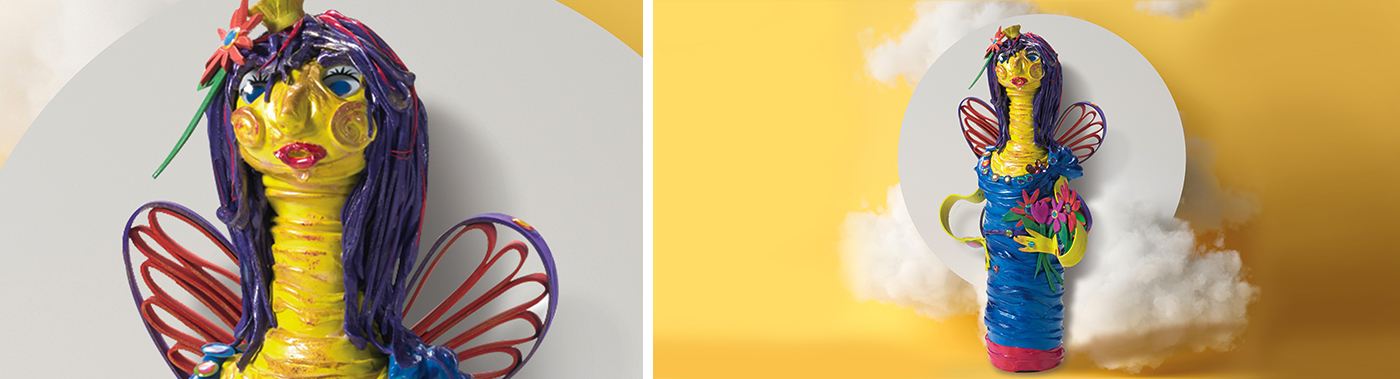
Whimsical Winged Figures
Lesson Plan, Grades 7-12, History, Language Arts, Social Studies, Science, 3-D, Mixed Media
Description
Lesson plan and artwork by Phyllis M. Annett
This mixed media lesson will enable students to see and produce artwork that will link the Visual Arts to other disciplines. It connects the Visual Arts to Language Arts as well as Social Studies through the history of fictional and imaginary characters. It uses organic forms to link the project to Science. The addition of wings to the Whimsical Winged Figures ensures that students will incorporate whimsy and imagination to their work.
Objectives
- Students will learn how to utilize mixed media over an armature to represent a winged figure by adding two and three dimensional materials to create astanding winged figure.
- Students will study the work of famous literary story tellers to obtain inspiration for their own work.
- Students will study the human form work for Modigliani and Picasso and Calder to see how the organic shapes of the human body can be distortedinto whimsical forms.
- Students will give their characters identity and personality by giving a 'name' to their winged figures.
Supplies Needed
WonderFoam® Sheets, 12"x18", Pack of 10 207171
Creativity Street® Painted Eyes, Pack of 100 085866
Creativity Street® Peel and Stick Gemstones, Multiple Sizes, Pack of 271 407658
Creativity Street® Lo-temp Mini Glue Gun 295070
Creativity Street® Colossal Brush Assortment 076181
Creativity Street® Pattern Rolling Pins, Set of 4 085814
AMACO® Cloud Clay, 6lb box, Assorted Colors 1361983
Sax® Multimedia Varnish, Gloss, Gallon 403961
Aileen's Tacky Glue, 16 oz 443024
Glue Sticks, 4" x 5/16", Pack of 100 1452544
Playcolor® Water-Soluble Solid Tempera Sticks, Metallic, Set of 6 1439039
*Here are the supplies needed for this lesson plan for reference. Find a convenient carousel of shoppable products for this lesson below.
Standards
CONTENT Standard #1: Generate and conceptualize artistic ideas and work.
CONTENT Standard #2: Organize and develop artistic ideas and work.
CONTENT Standard #3: Define and complete artistic work.
CONTENT Standard #5: Develop and refine artistic work for presentation.
CONTENT Standard #7: Perceive and analyze artistic work.
CONTENT Standard #8: Interpret intent and meaning in artistic work.
CONTENT Standard #10: Synthesize and relate knowledge and personal experiences to make art.
CONTENT Standard #11: Relate artistic ideas and works with societal, cultural and historical context to deepen understanding.
Instructions
1
Discuss and show the human figure work of Calder, Picasso and Modigliani. Point out how these artists used organic forms to create their work and stretched the limits of the human form.
2
Have students search for containers that may remind them of human forms to use as armatures for their Winged Figures. They can use plastic water bottles, larger plastic juice bottles, long neck or short neck bottles.
3
Have students use their imaginations to the fullest to create whimsical figures loosely based on the human form.
4
Have students incorporate a set of wings on the figures. Instead of solid wings, show the students a Paper Quilling method, such asthe Wheatear Coil shapes. These will be light and open and give the figure more of an ethereal look.
5
Show the students how to wrap Model Magic around their plastic or glass bottles. No glue is needed. Just press the product onto the armature or coil it up from the bottom or top of the bottle shape. Form the head and hair and any embellishments you like.
6
Add the wiggle eyes before the Model Magic is allowed to dry. This will ensure their position on the face and push the clay around the eyes to set them in.
7
Use Pattern Rolling Pins to add texture and interest to the figure.
8
Use the WonderFoam® Sheets to create arms, hands, maybe dangling legs, and any details that you can think of to give the work more personality. The foam sheets are easy to cut and can be bent, curved, or woven into three dimensional shapes.
9
Metallic Tempera Sticks will add highlights to the work. It dries to a non-smear, permanent state in a matter of seconds.
10
Add the gemstones and wiggle eyes to add more interest to the figure.
11
After it dries, the entire project should be given a light coating of Sax® Multimedia Varnish to give strength and durability.
12
The Whimsical Winged Figures can be given names to add personality. Students can evaluate their own work and the work of others.
Notes: A glue gun works very well in the creation various shapes made from the foam. After it dries, the added support of a paper clip or a clothes pin to hold shapes into place, works well to aid in the drying process.


